Whether you’re on desktop or mobile, our Message Center delivers a seamless communication experience. This powerful tool helps you strengthen connections with your fans and keeps them informed about when you’re online. Use your Contact List to keep track of everyone—from your top spenders to recent chat visitors. Plus, boost your earnings by selling content directly to members and responding to paid messages. Ready to take your engagement and earnings to the next level? Read on to learn more!
Table of contents
- Archived Messages
- Message Center Restrictions
- Set your Message Pricing
- How to Send Messages
- Adding Images to Your Message
- Review and Respond to Messages
- Deleting Conversations
- Blocked Members
- Changing the Font Size
- Message Center Guidelines
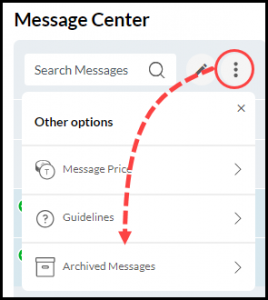
Messages from the previous Message Center are not visible in the latest version of Message Center. To view messages that were created in the previous Message Center, click on the three dots in the top left pane and select “Archived Messages”.
It’s important to note that, while members can initiate contact with any model, models are restricted to initiating contact only with members in their contact list. This list is comprised of your loyal fans including bounty members, recent visitors, fan club members, top admirers, top spenders, or members who have initiated the first message with you. If you initiate the first message with a member from your contact list, there is a 24-hour waiting period before you can send another message to the same member. Once the member responds, the 24-hour waiting period no longer applies, and both you and member can freely exchange messages.
The ability to send bulk messages to your loyal fans has also been temporarily disabled.
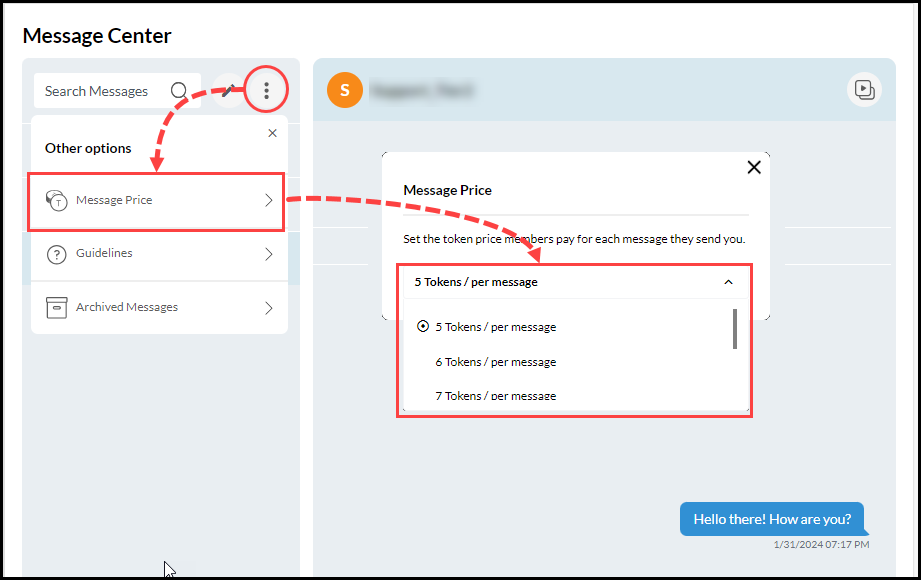
Members must use tokens to send messages. To set your token pricing, click on the settings icon (three dots), then select “Message Price”. You can choose a price between 5 and 10 tokens per message.
To earn tokens from messages sent by members, you must respond to each message individually. For example, if a member sends five messages and you respond to only one, you will earn tokens for only the one message you responded to. Your earnings report will show your earnings as “Replied to Paid Msg” for the messages you have responded to.
You may only send messages to members from your contact list. To initiate a new message, please follow these steps:
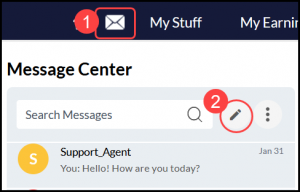
- Click on the “Message Center” icon to access it.
- Click on the “Start Conversation” icon.
- Browse through the displayed list of members you can contact (refer to the Message Center restrictions outlined above). Simply click on a member’s handle, or if you have a specific handle in mind, use the ‘Search Contacts’ field. If the handle is unknown, start typing the first letter, and a list of handles beginning with that letter will appear. You can refine your search by continuing to type.
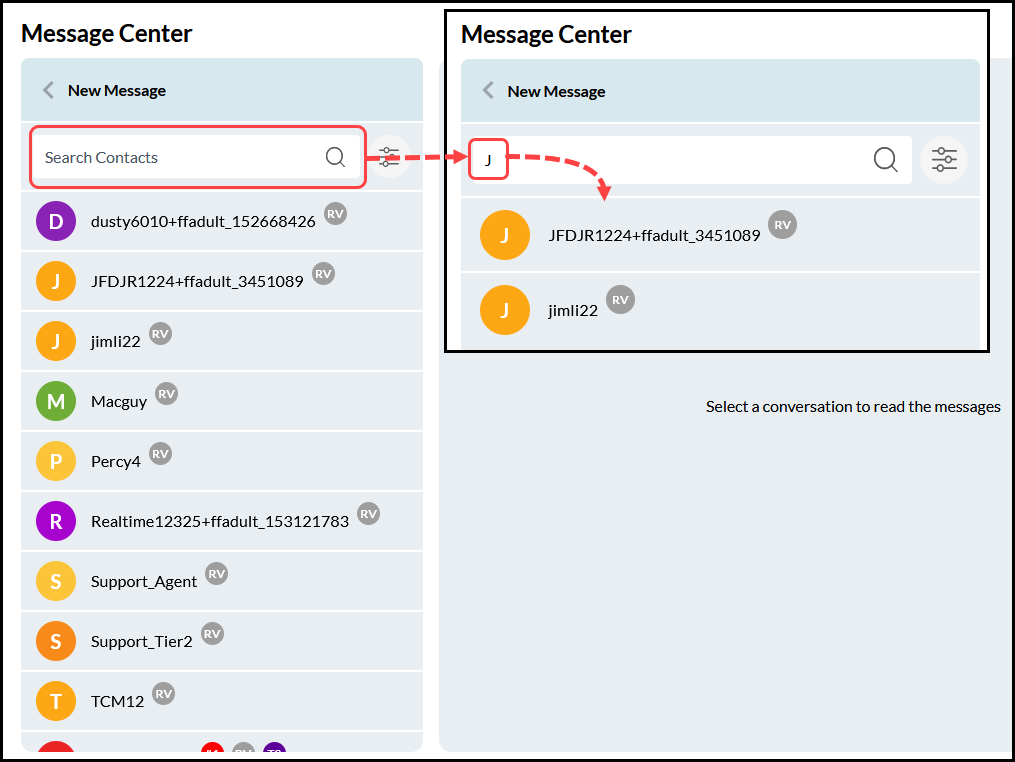
- You can also refine your search by clicking the “Filter” icon to search for your loyal fans.
- Click on the desired filter(s), then clicking “Apply”.

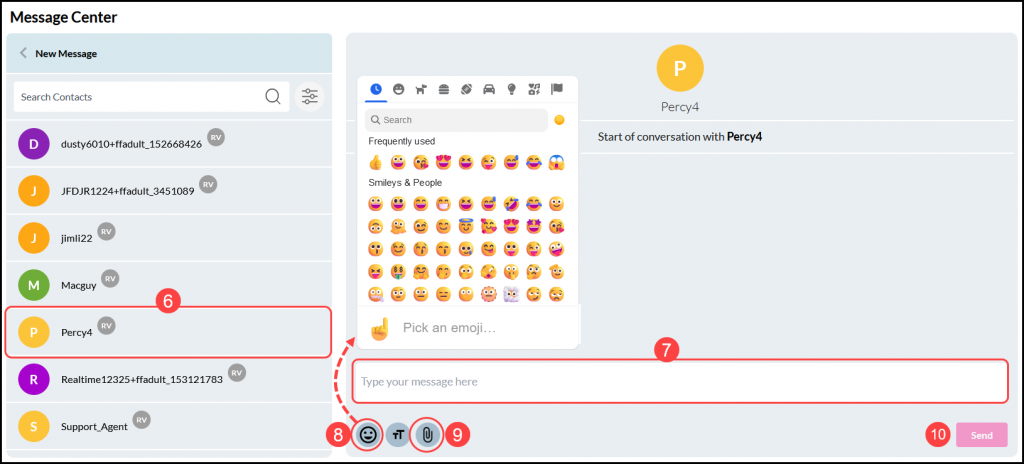
- Click on the member’s handle to whom you wish to send a message.
- Type your message in the message field.
- Enhance your message by adding emoji’s by clicking on the “Emoji” icon.
- You can attach one image per message by clicking on the ‘Attachment’ icon, then select the image(s) you want to include. Accepted file formats are jpeg, jpg, and png, with a maximum file size limit of 20MB per image.
- When you’re ready to send your message, click the “Send” button.
Note: All messages are subject to review to ensure compliance with our messaging guidelines.
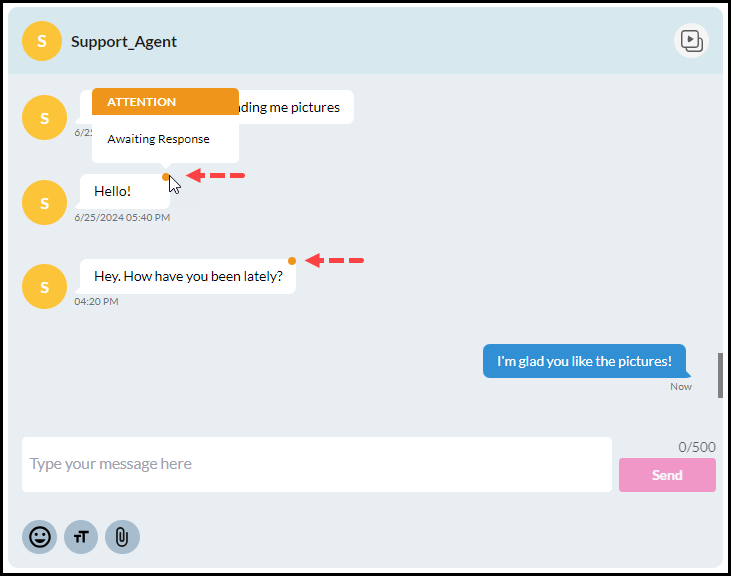
Unanswered messages are marked with a dot in the upper right corner. Once you respond, you will earn tokens for replying.
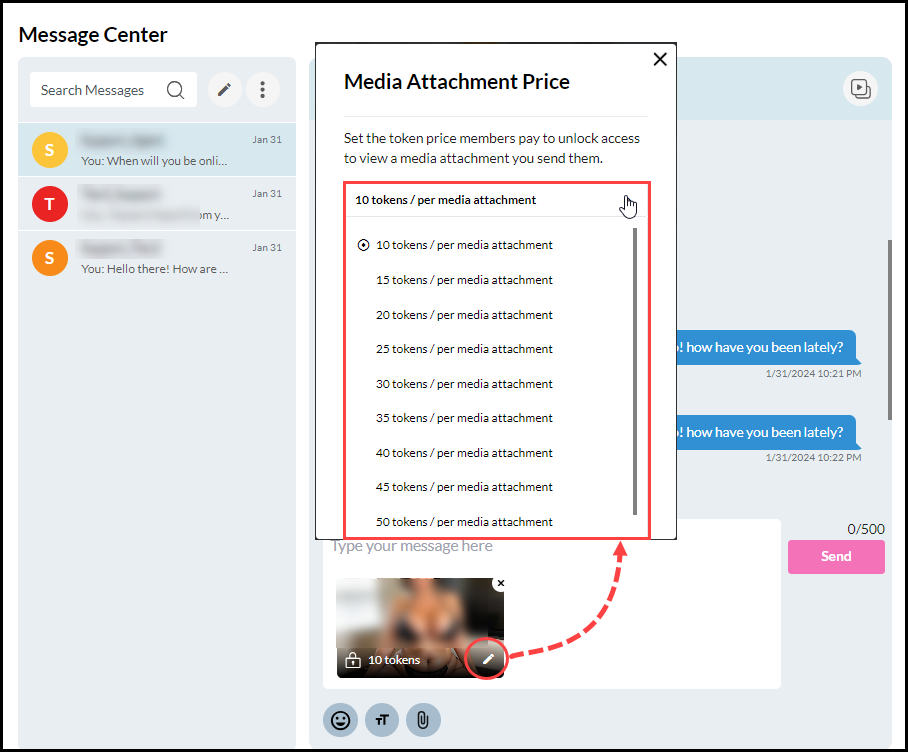
Members will need to use tokens to view images you attach to your messages. To add an image, click on the attachment icon (paper clip) and select an image to send.
The default price for an image is set to 10 tokens. To change the price, click on the edit icon (pencil) and select the desired amount from the drop-down menu. Members will see a blurred image and will need to use tokens to view it.
You can view all the media you’ve sent to a member by clicking on the “Shared Media” icon in the upper right corner of the message. Media that the member has purchased will display a “Sold” badge in the upper right corner. To filter the view, click on the “Sold,” “For Sale,” or “All” buttons at the top of the Shared Media section.
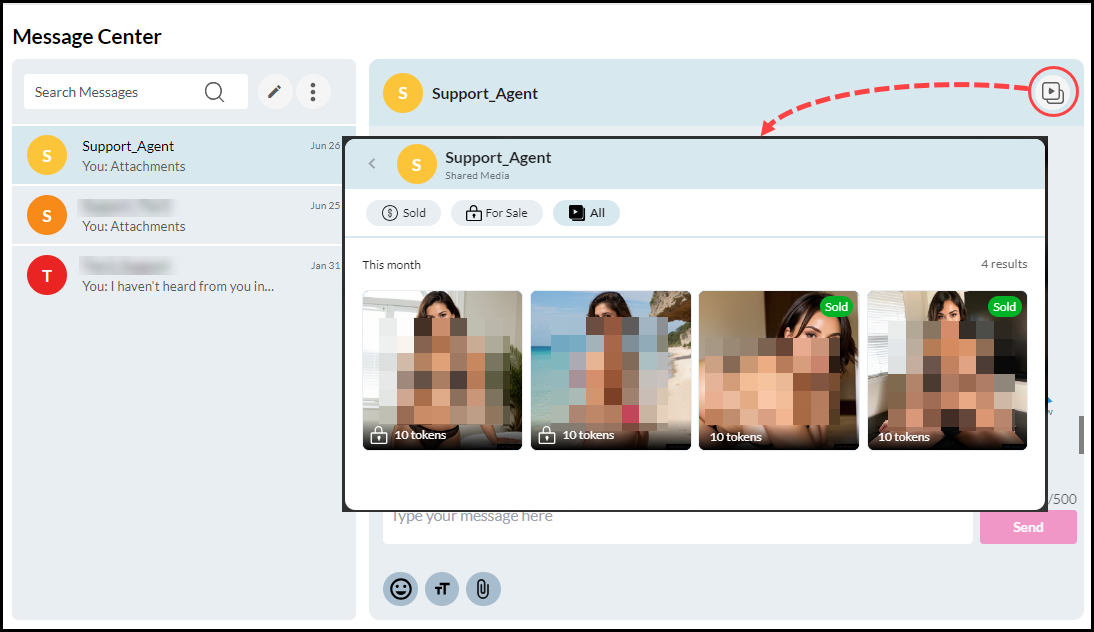
Your earnings report will show “Msg Media Content” for any media a member has purchased.
Review and Respond to Messages
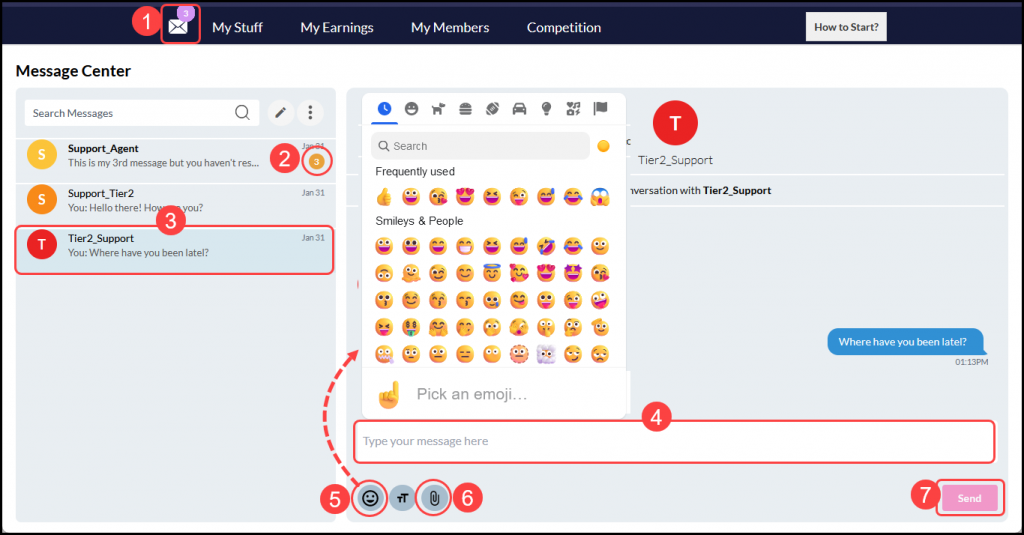
- To review and respond to messages, select the “Message Center” icon in the navigation bar.
- Click on the member handle of the desired message in the left pane.
- Respond by typing a message in the provided field.
- Enhance your message by adding emoji’s by clicking on the “Emoji” icon.
- Attach up to five images by clicking on the ‘Attachment’ icon, then select the image(s) you want to include. Accepted file formats are jpeg, jpg, and png, with a maximum file size limit of 20MB per image.
- Click the “Send” button to send your message.
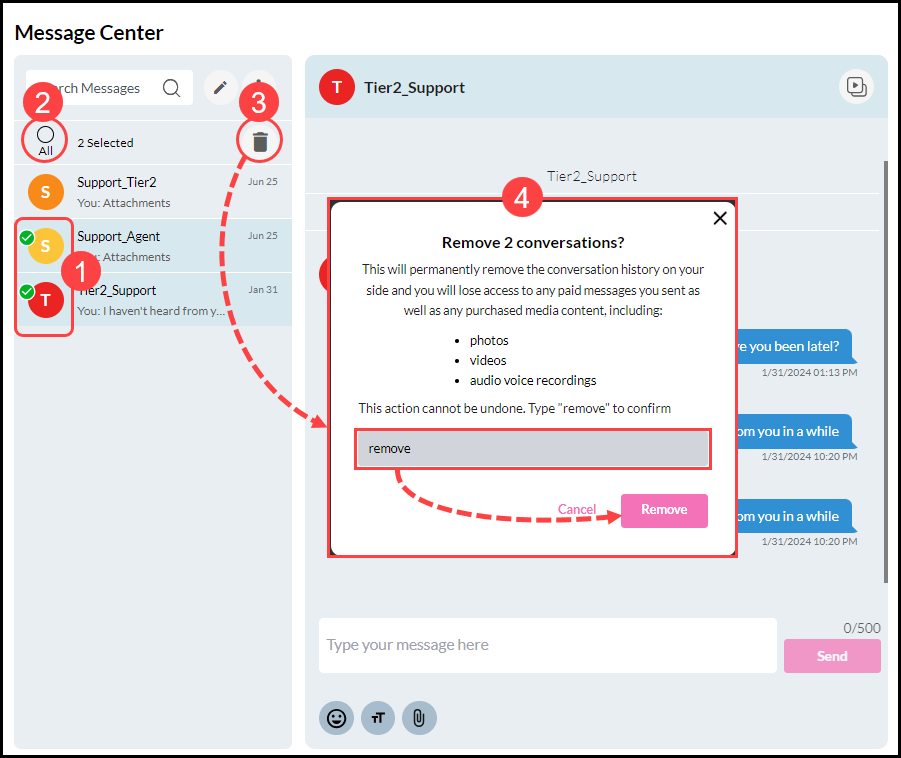
- To delete a conversation, click the avatar to the left of the member’s handle. A checkmark appears to indicate the selection. Multiple conversations can be selected and deleted simultaneously.
- For deleting all messages, click on the “All” radio button.
- Click the trash can icon to delete the selected conversation(s).
- An overlay is displayed informing you that all photos, videos and audio voice recordings will be permanently deleted and cannot be recovered. Confirm the deletion by typing “remove” in the text box then click the “Remove” button. Note: Old messages will not be displayed if you start a new conversation with a member at a later date.
Blocked members won’t be able to send you messages, and you won’t be able to send messages to them. If you’ve exchanged messages with a member and later decide to block them, they will see the prompt below when attempting to send another message.

On that same note, if you’ve exchanged messages with a member and later decide to block them, you’ll be prompted to unblock them if you attempt to send another message. Clicking ‘Unblock Member’ will remove them from your block list, allowing both parties to exchange messages freely.

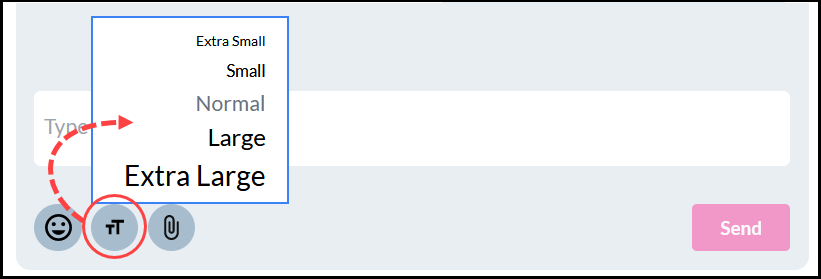
For enhanced readability, customize the font size of your messages according to your preference. Simply click on the ‘Font Size’ icon within a message and choose your desired size from the available options.
To view the Message Center guidelines, click on the three dots in the top left pane and select “Guidelines”.
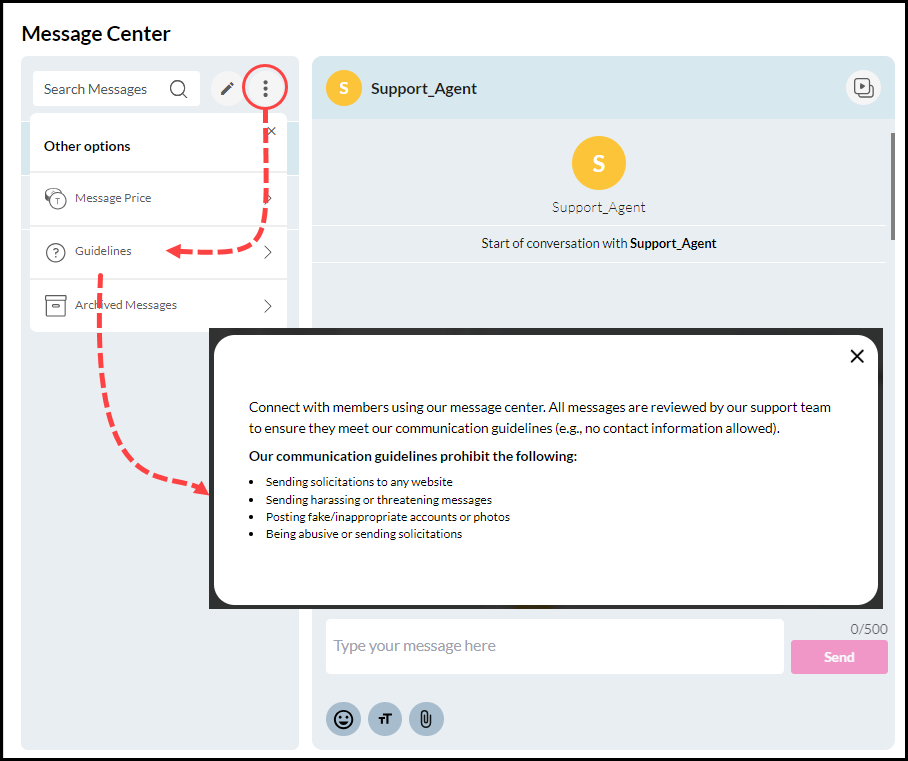
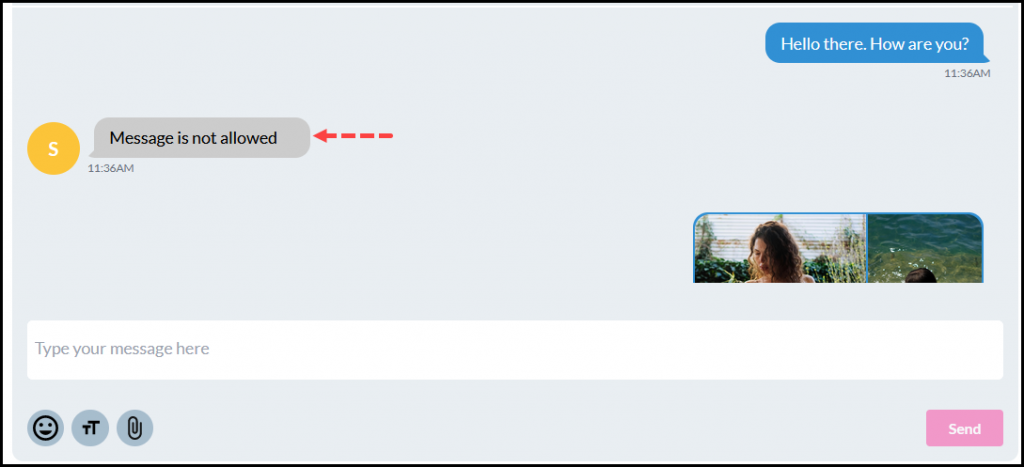
Messages that violate our message center guidelines will be denied and will be replaced with the message “Message is not allowed”.
